 Tweet
Tweet
zeegler, lookin good bro!! I cannot wait to see them finished, you'll have to keep us posted on the progress like you have been.
-
'Howling in shadows
Living in a lunar spell
He finds his heaven
Spewing from the mouth of hell' -
Cool....well, good luck!Comment
-
Zeeg!
Please take lots of pics when working on the inlays. Something like this would be very informative for all._______________________
semi-automatic hate machine...Comment
-
Awesome work bro!Don't forget the corn. It's nutritious, delicious, and ribbed for her pleasure.Comment
-
I finally finished touching up the binding paint line today, so now it's time for clear coat. I figure if I'm going to pull the frets, then I might as well do it now before I clear it, that way it will be easier to mask the board. I'll be starting on that tomorrow, so let me know if you want to see pics of the fret removal process, and I'll make sure I take some.Comment
-
A few new pics.
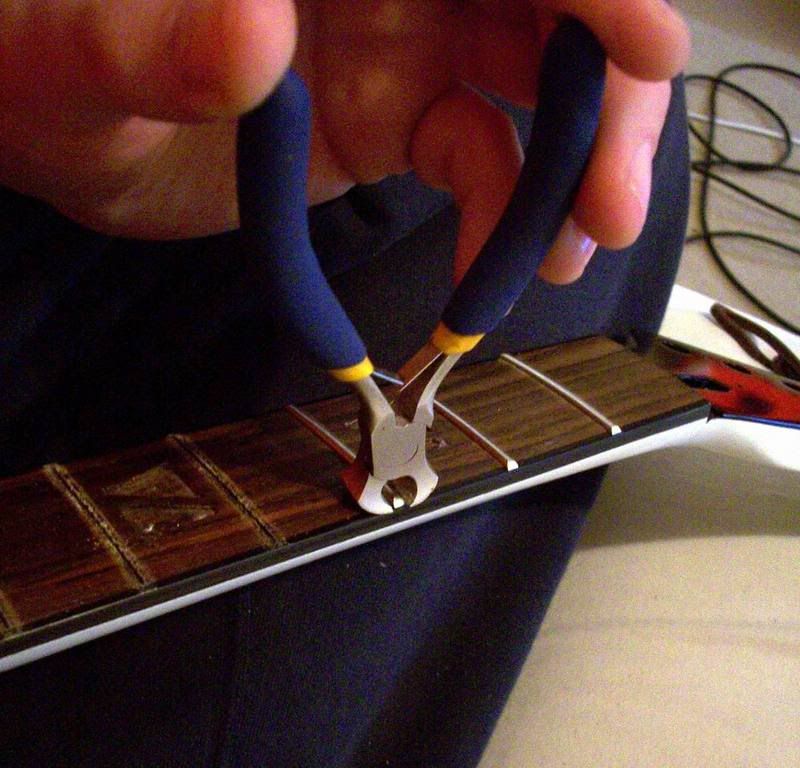
Here, I am using a modified end-cutter to remove frets. The end cutter has been ground down so that the edges are thin and sharp. They easily slide under the end of the fret. I start at one end, letting the wedge shape of the end cutter blades lift the fret gradually as I move from one end of the fret to the other.

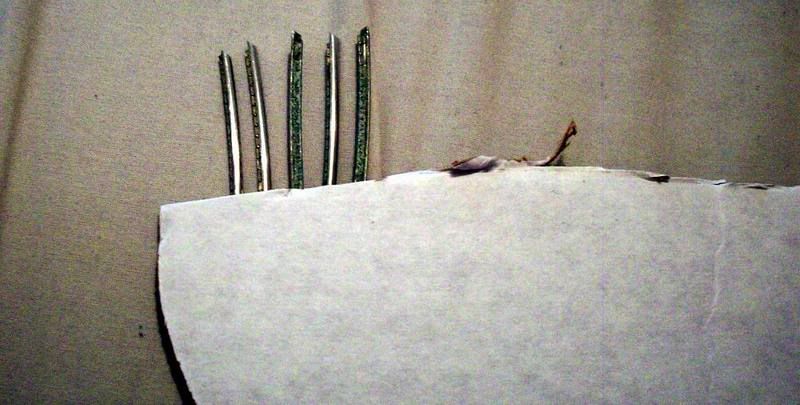
The frets are easily removed with no damage whatsoever. This is great, because the frets have no wear, so I can re-use them and save the time of cutting new ones. They will still have to be re-levelled and crowned again though. I stick the frets in the edge of a piece of corrugated cardboard to keep them in order.
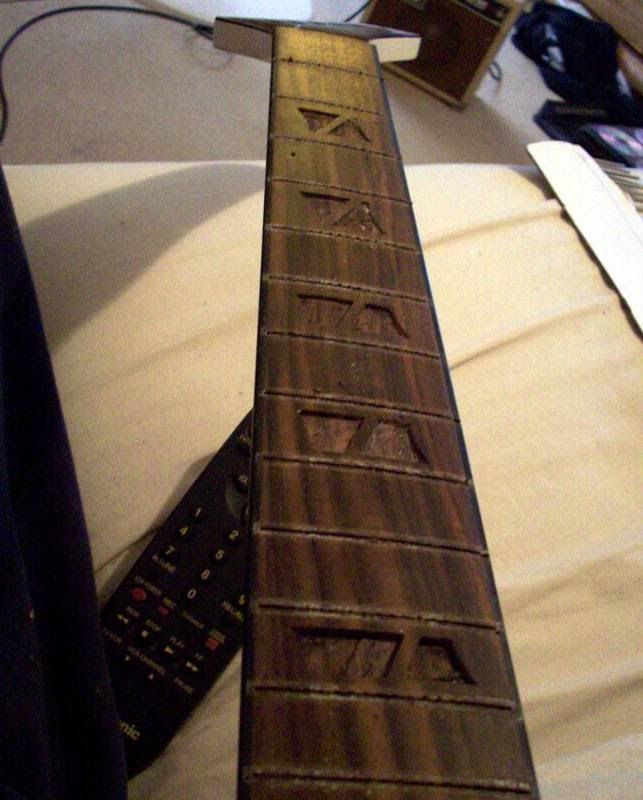
The naked board.
And finally, the board masked off, ready to shoot some clear. I didn't have to be super fussy about the masking tape edge because the board will have to be sanded after the new inlays are in anyway, so that would remove any overspray.

Now for about 10-12 coats of clear. Once that is done, the guitar will be hung up out of the way for about a month to allow the clear to cure and harden before it is wet sanded and buffed. Then comes the fun part of routing for the new inlays. Yeeehaw!Comment
-
Awesome work so far. Love the updates.-------------------------
Blank yo!Comment
-
so,I posted in the new thread too...but I am just going to *BUMP* this on up so its easier to find when I visit here...
awesome remod you have there,I am currently re-doing an Ibanez "lawsuit" Explorer to closely resemble an ancient Gibson Explorer that I owned from the mid-'70s to the mid-'90s...and still regret selling off.
I also had the luthier I shoot guitars for order me a huge slab of mahogany,an oversized bookmatched piece of flamed maple,and some nice maple planks (for the neck) and a fine piece of pauo ferro to build my "Dream Explorer" with.
keep the pics of your build coming man
Comment
-
Polish that turd, zeegs! "Quiet, numbskulls, I'm broadcasting!" -Moe Howard, "Micro-Phonies" (1945)
Comment
-
Cool, that looks like a fun little project!! Seeing as how you went through such an effort to get the polished frets out, id go all out on the inlays to make it worth the while!! HEll, order some SS frets while your at it, turn that thing into a monster!Comment
-
Man, I love what you've done with that guitar. It used to look like a retarded Destroyer, but with your modifications, the "swing" in the body shape makes it look like an Explorer should--sleek and threatening! Good luck with the inlays, dude!!From here on the nightmare only gets worse...Comment
-
Very nice job - are you just going to reroute for pearl block inlays, or maybe some contrasting wood?Comment
-
Yeah, I was just planning on pearl or abalone block inlays. I just want to do whatever is easiest.Originally posted by lhrocker View Post
Comment

Comment