 Tweet
Tweet
Are there any pre-slotted Tusq/Graphtech nuts that would be a drop-in replacement for the Model series guitars, specifically a Model 7? I ran a search here but couldn't find anything. My main complaint is that the high E string is too close to the edge of the fretboard. When I try to do pull-offs especially of the first three or four frets, I have to be careful that I don't pull it right off the neck itself. I had the stock nut replaced a number of years ago by a luthier with a bone one, but he must've just used the original as a template because it suffers from the same problem.
-
-
The Gibson one works pretty well - model PQ-6010-00- you would need to sand the base down a bit (your girlfriend's/wife's emory board good for this), and then use the same to clean up the ends as it will be a touch wide. I just finished one up on a Grover Jackson that I bought in pieces on ebay, and it works pretty well...MountainDog did one too, here's his synopsis...
"I had measured the stock SL2HT nut and noticed the specs on that Gibson Tusq were very very close. It was maybe .010" to .020" thicker (ie front to back), and was about 0.020" to 0.030" wider (ie side to side) and the top of the two ends were more square than the stock nut, so I rounded them to match the stock radius. Sanding time, maybe 3 to 5 minutes. It was slightly taller (bottom of nut to bottom of groove), but I left that alone as I knew I would file the grooves deeper. I think I filed maybe 0.030 to 0.040" to get my desired string heights above the 1st fret.
I scored the clear coat all around the stock nut with an exacto blade, lightly tapped the nut with a small hammer on a flat blade screwdriver, popped right off. I scraped off some minor remanants of glue, did a couple dry fits, then used super glue to attach the Tusq nut (glue on the back edge of fingerboard as well as the nut cut), centered it side-to-side, and held it for a few minutes, then lightly tightened the D & G strings to give a little 'clamp pressure' and let it sit overnight before I filed it.
By the way, the stock nut has the groove starting out straight, but then the slot angles heavily to the right on the G, B, E strings. I had a couple tuning problems I think due to the strings binding in those angled slots. The Tusq nut has straight grooves and that's how I kept them. No tuning issues now, I think the strings slide better on the Tusq material."
Hope that helps!Crime doesn't pay. Neither does lutherie... -
Missionguitars1, thanks for thinking enough of my posting to repeat again here!
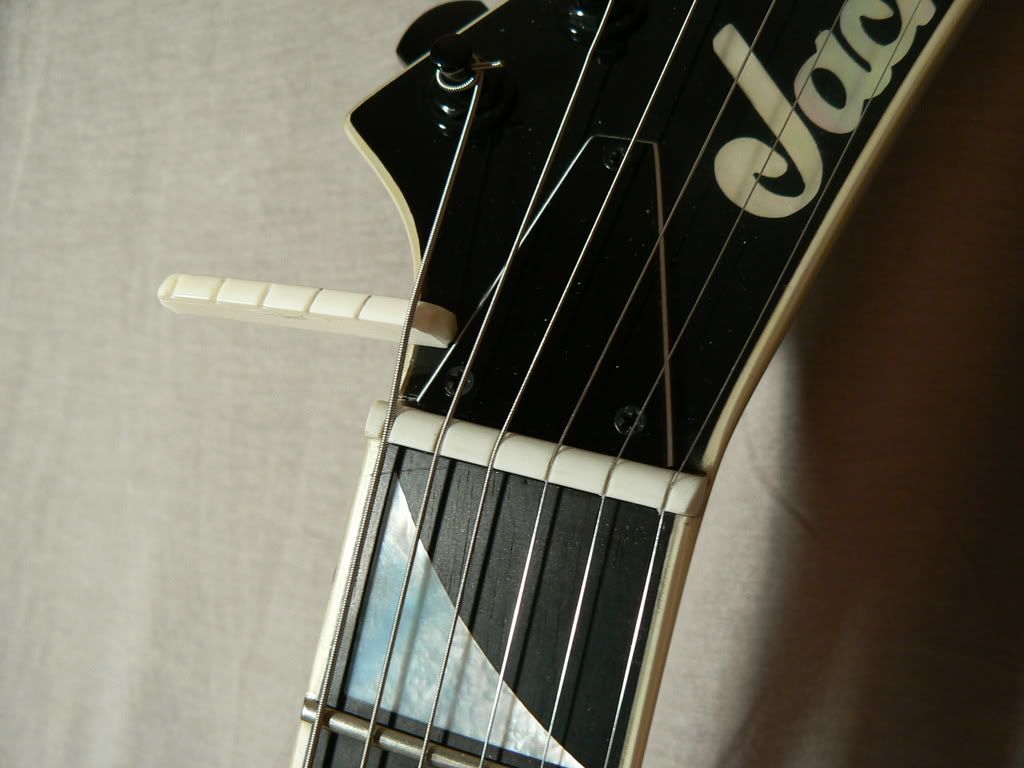
Here's a link to a pic of my installed Tusq nut (original is stuck in the E string for reference):
Comment
-
No worries at all, gotta give credit where credit is due!Originally posted by MountainDog View Post
The funny thing was, your original post came to mind this last weekend when I was re-assembling this Grover Jackson phototop I bought cheap on ebay, and one of the hidden issues was a nut that was cut too low. Grabbed a Gibbie-sized one and an emory board, and 20 minutes later - new nut! Gonna sell the guitar, so I'll leave it with action a touch high, but I didn't need to re-file the slots - worked great!
Thanks again for the original post!Crime doesn't pay. Neither does lutherie...Comment
-
Thanks for the info. Would filing it down on the low E side alone be OK, or will the low E be too far off the board then?Comment
-
Not sure what you are asking, are you talking about sanding down the ends slightly as we mentioned above due to the nut being a little wider than the board?
What you want to do is install the new nut so that the strings are aligned left/right on the neck the way you want. You can do 'dry fitting', ie put the new nut in place (no glue!) and slightly tighten the strings to hold it in place and kinda get a feel for where you want it. Then you can see how much extra the nut sticks out beyond the board on both the low E and high E side. Mark the nut with a pencil on how much you need to sand down the width on each side, remove nut, sand to your marks, replace nut (dry fit) and check everything again. By doing this, you'll end up with a nut that has the strings aligned as you desire, with the left/right ends sanded to blend to the width of the fingerboard.Comment
-
MountainDog,
Yep, that answers my question. Thanks!Comment
Comment