About 12 years ago, I attempted to "ebonize" a rosewood fretboard using the "steel wool and vinegar" recipe. That failed, because recent Google research tells me the mixture needs to chemically react with the high tannin content in certain woods to turn it black. I don't think rosewood has a high tannin content.
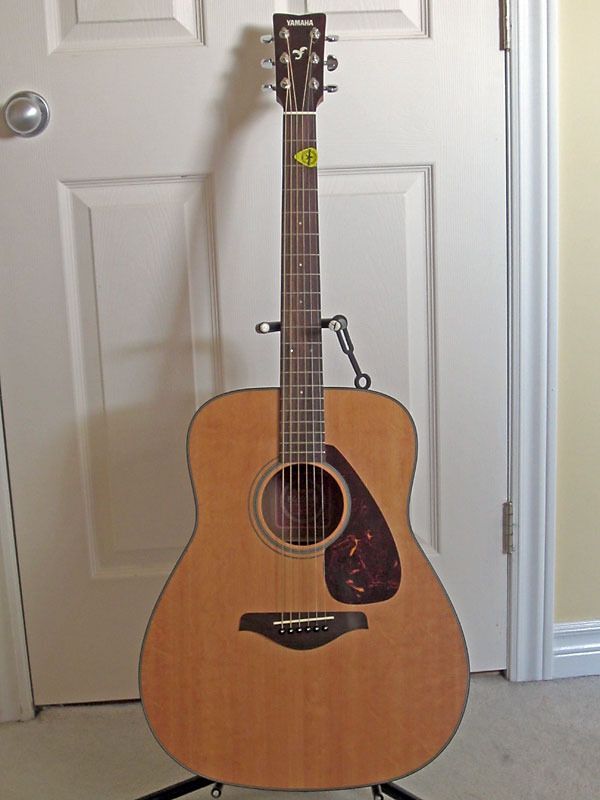
A few months ago, I bought used Yamaha FG700MS in practically mint condition for CAD$100 (no case). Seen below, its rosewood fretboard and rosewood bridge would serve as an inexpensive test bed for this ebonizing project. If successful, I hoped to stain the rosewood fretboard on my Jackson KE3.
I wanted a simple procedure to stain a rosewood board black and decided that this Les Paul owner's success (http://www.mylespaul.com/forums/showthread.php?t=212455) using the Minwax Wood Finish Stain Marker (http://www.minwax.com/wood-products/...h-stain-marker) would be ideal, and it would only cost CAD$7.50 for the marker from The Home Depot.
Since that Les Paul owner didn't outline any instructions, I followed the general procedure given on the StewMac site for their ebony stain (http://www.stewmac.com/Materials_and...ard_Stain.html) as follows:
However, I modified the procedure. Instead of sanding, I used 0000 steel wool. Instead of applying one coat, I wanted to follow the Les Paul owner's example and apply multiple coats, three in total. Sometimes I had to allow multiple overnights for drying instead of one night. I rubbed off excess pigment with a dry cloth for the first two coats, and rubbed with a slightly damp cloth after the third coat.
Pic results below.
Figure 1. Masking off areas I didn't want to touch with naphtha, 0000 steel wool, or marker stain.
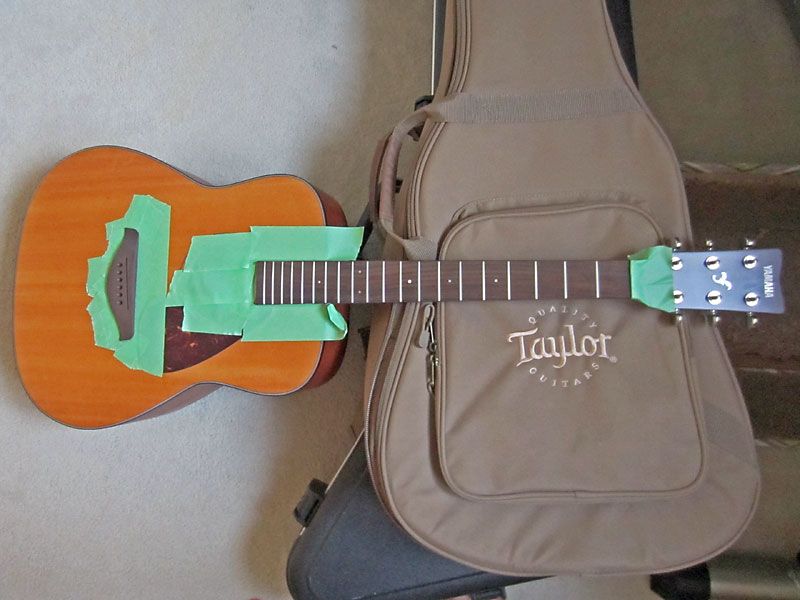
Figure 2. First coat of Minwax ebony marker on odd numbered frets for direct comparison with untreated even numbered frets. I also stained the bridge but showing it is not useful for this comparison.
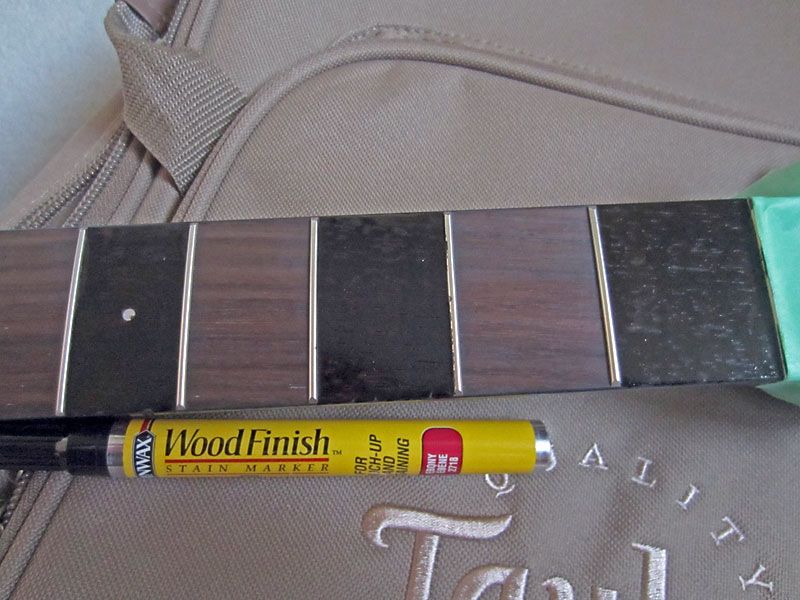
Figure 3. After the first coat dried overnight, I rubbed the first fret with a dry cloth. It looks like the rubbing action removed much of the stain, compared to the third fret which I hadn't yet rubbed. Compare both to the untreated even numbered frets. I rubbed all the odd frets and applied a second coat of stain, leaving it for two overnights. Rubbed and got similar results. Third coat, three overnights (was busy), damp-rubbed, and got similar results. By now my marker was running dry.
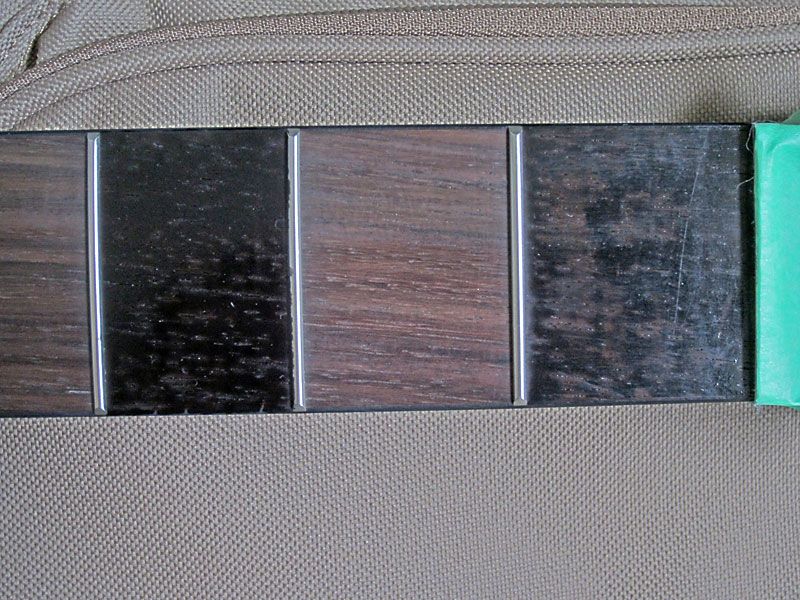
Figure 4. This is after the third coat, damp-rub, and steel wool burnishing.
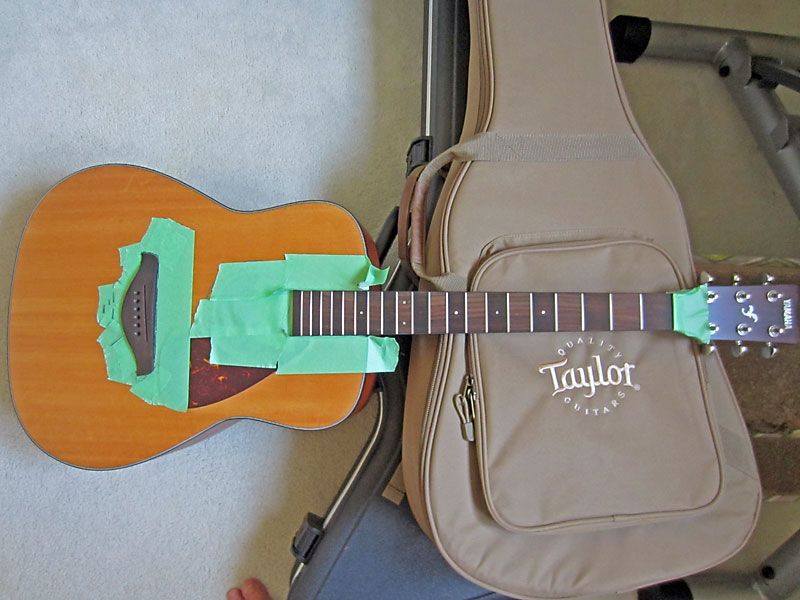
Figure 5. Closer view after the third coat, damp-rub, and steel wool burnishing.
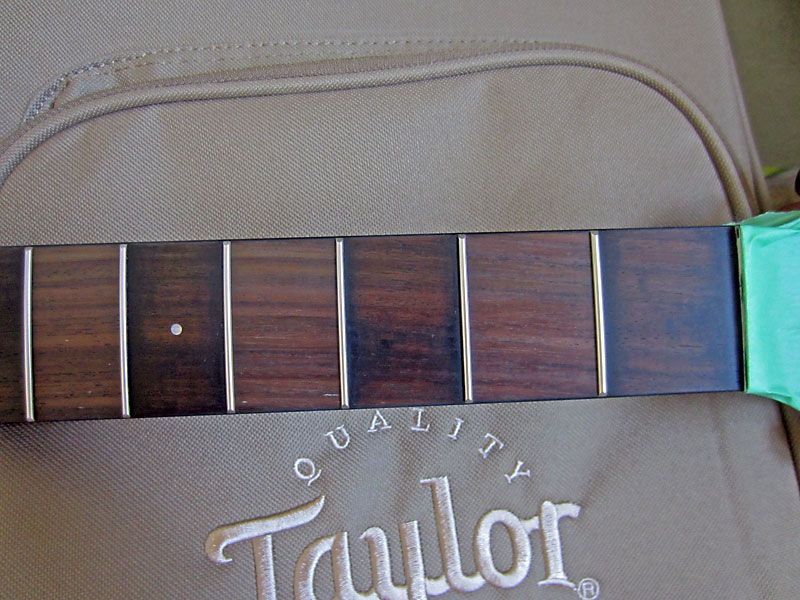
Figure 6. Closer view after the third coat, damp-rub, and steel wool burnishing. I've reached the end of the StewMac procedure (with three coats) and am disappointed with the inconsistency of the staining results.
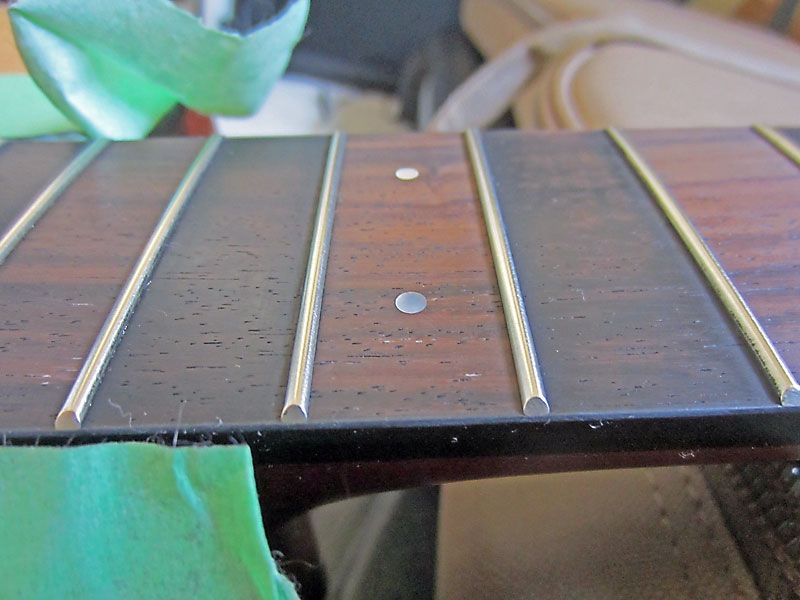
Figure 7. By now, I give up and resume my normal restringing procedure of applying lemon oil to the ENTIRE fretboard (and bridge) and rubbing off the excess. At least the fretboard doesn't look as parched.
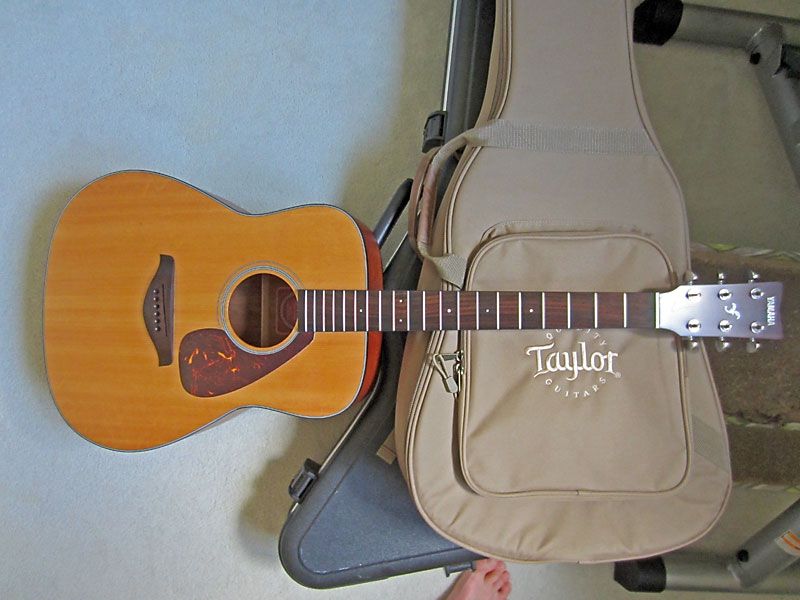
Figure 8. Same as Figure 7.
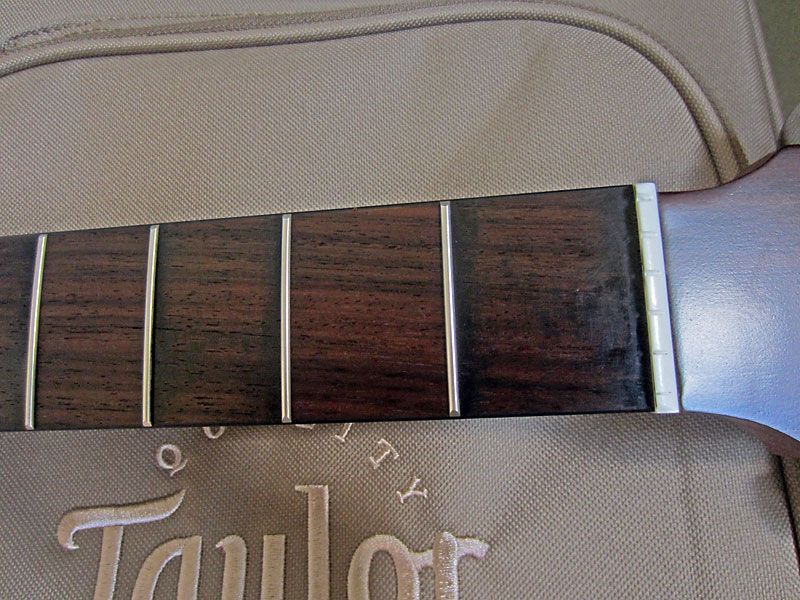
Figure 9. Same as Figure 7.
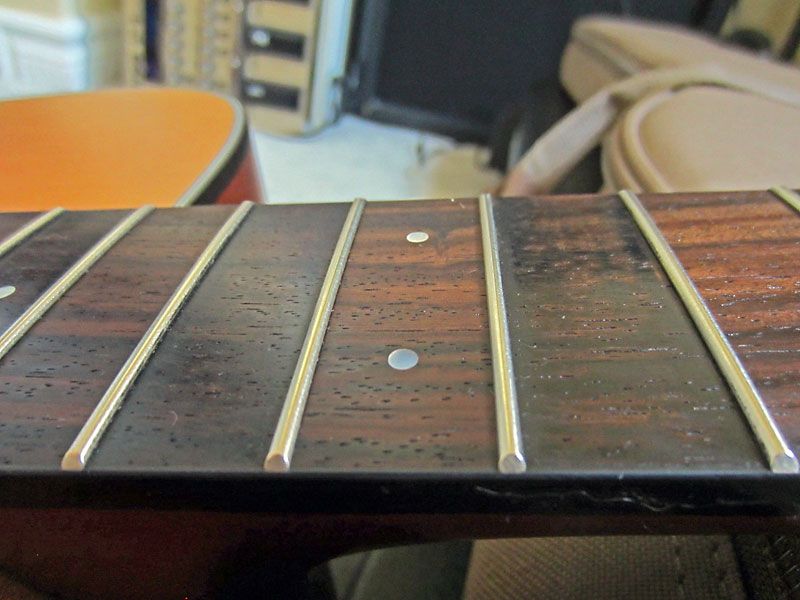
Conclusion and notes:
1) This experiment was a failure.
2) The marker stain was easy to apply and you don't need to be overly careful. You can apply it over the fretboard inlays and the frets themselves and it won't really cling to them. It came off rather easily with the cloth rubbing, but I've also heard a pencil eraser will do the same.
3) The actual work is not particularly time-consuming because of the above. It took mere minutes to apply stain and perform the rubbing. Most of the time is spent during the overnights while waiting for each coat to dry, so this took me about a week total.
4) I have no idea why I got inconsistent results between frets. Some fretboard areas took the stain well, while others were patchy.
5) I'll just appreciate the beauty and grain of rosewood as-is until shown a repeatable, proven, simple procedure for dyeing a rosewood fretboard black.
A few months ago, I bought used Yamaha FG700MS in practically mint condition for CAD$100 (no case). Seen below, its rosewood fretboard and rosewood bridge would serve as an inexpensive test bed for this ebonizing project. If successful, I hoped to stain the rosewood fretboard on my Jackson KE3.

I wanted a simple procedure to stain a rosewood board black and decided that this Les Paul owner's success (http://www.mylespaul.com/forums/showthread.php?t=212455) using the Minwax Wood Finish Stain Marker (http://www.minwax.com/wood-products/...h-stain-marker) would be ideal, and it would only cost CAD$7.50 for the marker from The Home Depot.
Since that Les Paul owner didn't outline any instructions, I followed the general procedure given on the StewMac site for their ebony stain (http://www.stewmac.com/Materials_and...ard_Stain.html) as follows:
1) Clean the wood with naphtha and sand to 600-grit.
2) Mask off the nut, binding and anything you don't want to stain.
3) Wear gloves. Apply with a brush or cloth.
4) Let the board dry overnight.
5) When dry, rub off excess pigment with a slightly damp cloth.
6) Let the board dry overnight again.
7) Rub with 0000 steel wool to burnish and remove any last pigment.
Pic results below.
Figure 1. Masking off areas I didn't want to touch with naphtha, 0000 steel wool, or marker stain.

Figure 2. First coat of Minwax ebony marker on odd numbered frets for direct comparison with untreated even numbered frets. I also stained the bridge but showing it is not useful for this comparison.

Figure 3. After the first coat dried overnight, I rubbed the first fret with a dry cloth. It looks like the rubbing action removed much of the stain, compared to the third fret which I hadn't yet rubbed. Compare both to the untreated even numbered frets. I rubbed all the odd frets and applied a second coat of stain, leaving it for two overnights. Rubbed and got similar results. Third coat, three overnights (was busy), damp-rubbed, and got similar results. By now my marker was running dry.

Figure 4. This is after the third coat, damp-rub, and steel wool burnishing.

Figure 5. Closer view after the third coat, damp-rub, and steel wool burnishing.

Figure 6. Closer view after the third coat, damp-rub, and steel wool burnishing. I've reached the end of the StewMac procedure (with three coats) and am disappointed with the inconsistency of the staining results.

Figure 7. By now, I give up and resume my normal restringing procedure of applying lemon oil to the ENTIRE fretboard (and bridge) and rubbing off the excess. At least the fretboard doesn't look as parched.

Figure 8. Same as Figure 7.

Figure 9. Same as Figure 7.

Conclusion and notes:
1) This experiment was a failure.
2) The marker stain was easy to apply and you don't need to be overly careful. You can apply it over the fretboard inlays and the frets themselves and it won't really cling to them. It came off rather easily with the cloth rubbing, but I've also heard a pencil eraser will do the same.
3) The actual work is not particularly time-consuming because of the above. It took mere minutes to apply stain and perform the rubbing. Most of the time is spent during the overnights while waiting for each coat to dry, so this took me about a week total.
4) I have no idea why I got inconsistent results between frets. Some fretboard areas took the stain well, while others were patchy.
5) I'll just appreciate the beauty and grain of rosewood as-is until shown a repeatable, proven, simple procedure for dyeing a rosewood fretboard black.


 [/IMG]

Comment