Here's a little exercise I want to do. I've made the most out of my digital camera's software bundle for editing photos, but it has its limits. I recently got Photoshop and I'm using it strictly to edit photos. It has a lot more features and is more flexible, so I want to practice getting good with it.
Here's the deal. You post your mediocre guitar pictures and I'll try to enhance them so that you can save and share the enhanced versions. I'll also tell you what I did to them to enhance them, so that you can learn how to edit photos with basic image editing software. I'll also give my view on what you can do to improve your shooting in the future, because let's face it... the enhanced image will only be as good as the original image you shoot in the first place. So practice good photography to make your editing job easier down the road! You can't polish a turd. [img]/images/graemlins/wink.gif[/img]
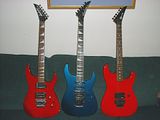
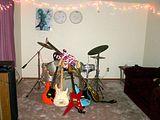
Let's begin with an example of what I'm talking about. Here are Travis' guitars. The first photo was taken with the built-in flash:
Click the thumnail for a larger version:
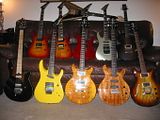
Notice the uneven lighting due to the flash. Notice the harsh flash glare. Enter rule number one... TURN OFF YOUR FLASH when shooting guitars or mostly anything else, for that matter. This isn't a hard and fast rule, but it's an EXCELLENT one for starters. Flashes have a way of making really gorgeous guitars look like absolute crap... and this is why a lot of people say, "Photos do NOT do this guitar JUSTICE!" And they're right. So please, turn it off! And I won't edit flash-taken pictures if they're THAT bad, so please don't feel offended because I have nothing to work with in the first place! Onwards...
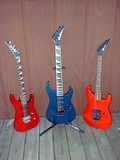
So Travis turns off the flash and gets this:
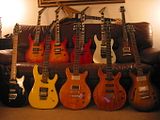
It looks a little more even and natural-looking. It looks more like what the human eye sees. To artists, obviously he or she has different filters, lenses, and tricks to use to make an image come out a certain way. But to me, guitar photography is replicating EXACTLY what you see with the human eye. Shooting product shots like guitars should be exact. However, the photo has a slight reddish cast, caused by the incandescent interior lighting of Travis' living room, so it's not totally natural-looking yet. Fluorescent lighting gives off a blue cast which you can correct for as well, either on your camera or using your software. Do it on your camera first, because it eliminates a lot of steps down the road. Additionally, the photo is still a little dark so we'll fix that in the next step.
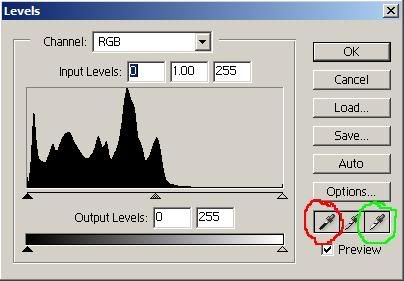
Now let's color balance the picture so that the whitepoints and darkpoints (I think those are the proper terms are called) are defined. Look up these things in your camera image editing software's manual because this is a basic feature that also happens to be extremely powerful. This gets rid of that horrible reddish cast. The guitars are kind of "hidden in the shadows"... that's my way of explaining that the midtones are too dark. Adjusting the gamma (middle slider on your histogram) slightly to the left allows the guitars to "jump" out of the shadows. The gamma adjustment keeps the extreme dark and extreme light ends of the spectrum relatively the same, but allow the low-mid and mid tones to jump out. This is a very handy technique for people shots (without a flash) as well, as overhead lighting usually makes people look like they have "raccoon eyes", and adjusting the gamma eliminates those shadows. Let's look at the new photo:
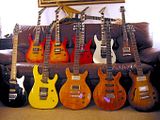
The color balance isn't 100% perfect, as I have not fully mastered the art of color balance yet, but I'm definitely working on it and you can see an improvement over the second photo. The whites are whites, the blacks are pitch black, and everything else in between looks as if you're looking at Travis' guitars with your own eyes. It's a great collection to show off to the world now!
In this thread, I'll also be offering miscellaneous tips and tricks for making the most out of your camera and software to really show off your guitars. I'm sure the photography buffs like Xenophobe and other guys who take good photos but maybe don't know it (Markus, Shawn, Budman, Kev Maynard, MHalsey, OnlineStageGear, and quite a few others) would probably chime in with their own tips, or to back up my tips as being really helpful.
So tip #1 is turn off your damn flash. However, doing this is effectively killing off a potential light source, which is why I encourage people to take photos in adequate ambient light. The easiest thing is to take your guitar outdoors and into a shaded spot because the outdoors are bright enough but the shade eliminates harsh sun reflections. Nothing ruins a potentially good outdoor guitar shot like harsh sunlight reflecting off polished chrome/gold hardware!
If you're lazy like me, you shoot guitars indoors under adequate light. Because you're turning off the flash, the camera's shutter needs to stay open longer to increase the exposure. During this time, the camera picks up on the subtlest hand shaking movements, so put the camera on a steady surface or tripod. Another tip here is to use the countdown/self-timer mode on your camera, because when the timer counts down, you're standing AWAY from the camera and not shaking it. Excellent.
More topics to discuss later, including how to white/color balance (which is what I did to Travis' non-flash photo above), how to do extreme closeup shots that you guys love my photos for, photo composition, discussing little pearls of wisdom that may have eluded you until now, why extreme numbers of megapixels are overrated when buying a camera strictly for web use, making the most out of Photobucket for forum sharing and Ebay selling, and loads more. Hope you enjoyed this little lesson because it took me a half hour to type up. [img]/images/graemlins/laugh.gif[/img] Your feedback is GREATLY appreciated, as I know some of you have been requesting guitar-related photo tips for a while, and I was writing a big Microsoft Word document about it, but then abandoned it.
So let's see some pictures you've been practicing with, preferably with no flash!
Here's the deal. You post your mediocre guitar pictures and I'll try to enhance them so that you can save and share the enhanced versions. I'll also tell you what I did to them to enhance them, so that you can learn how to edit photos with basic image editing software. I'll also give my view on what you can do to improve your shooting in the future, because let's face it... the enhanced image will only be as good as the original image you shoot in the first place. So practice good photography to make your editing job easier down the road! You can't polish a turd. [img]/images/graemlins/wink.gif[/img]
Let's begin with an example of what I'm talking about. Here are Travis' guitars. The first photo was taken with the built-in flash:
Click the thumnail for a larger version:

Notice the uneven lighting due to the flash. Notice the harsh flash glare. Enter rule number one... TURN OFF YOUR FLASH when shooting guitars or mostly anything else, for that matter. This isn't a hard and fast rule, but it's an EXCELLENT one for starters. Flashes have a way of making really gorgeous guitars look like absolute crap... and this is why a lot of people say, "Photos do NOT do this guitar JUSTICE!" And they're right. So please, turn it off! And I won't edit flash-taken pictures if they're THAT bad, so please don't feel offended because I have nothing to work with in the first place! Onwards...
So Travis turns off the flash and gets this:

It looks a little more even and natural-looking. It looks more like what the human eye sees. To artists, obviously he or she has different filters, lenses, and tricks to use to make an image come out a certain way. But to me, guitar photography is replicating EXACTLY what you see with the human eye. Shooting product shots like guitars should be exact. However, the photo has a slight reddish cast, caused by the incandescent interior lighting of Travis' living room, so it's not totally natural-looking yet. Fluorescent lighting gives off a blue cast which you can correct for as well, either on your camera or using your software. Do it on your camera first, because it eliminates a lot of steps down the road. Additionally, the photo is still a little dark so we'll fix that in the next step.
Now let's color balance the picture so that the whitepoints and darkpoints (I think those are the proper terms are called) are defined. Look up these things in your camera image editing software's manual because this is a basic feature that also happens to be extremely powerful. This gets rid of that horrible reddish cast. The guitars are kind of "hidden in the shadows"... that's my way of explaining that the midtones are too dark. Adjusting the gamma (middle slider on your histogram) slightly to the left allows the guitars to "jump" out of the shadows. The gamma adjustment keeps the extreme dark and extreme light ends of the spectrum relatively the same, but allow the low-mid and mid tones to jump out. This is a very handy technique for people shots (without a flash) as well, as overhead lighting usually makes people look like they have "raccoon eyes", and adjusting the gamma eliminates those shadows. Let's look at the new photo:

The color balance isn't 100% perfect, as I have not fully mastered the art of color balance yet, but I'm definitely working on it and you can see an improvement over the second photo. The whites are whites, the blacks are pitch black, and everything else in between looks as if you're looking at Travis' guitars with your own eyes. It's a great collection to show off to the world now!
In this thread, I'll also be offering miscellaneous tips and tricks for making the most out of your camera and software to really show off your guitars. I'm sure the photography buffs like Xenophobe and other guys who take good photos but maybe don't know it (Markus, Shawn, Budman, Kev Maynard, MHalsey, OnlineStageGear, and quite a few others) would probably chime in with their own tips, or to back up my tips as being really helpful.
So tip #1 is turn off your damn flash. However, doing this is effectively killing off a potential light source, which is why I encourage people to take photos in adequate ambient light. The easiest thing is to take your guitar outdoors and into a shaded spot because the outdoors are bright enough but the shade eliminates harsh sun reflections. Nothing ruins a potentially good outdoor guitar shot like harsh sunlight reflecting off polished chrome/gold hardware!
If you're lazy like me, you shoot guitars indoors under adequate light. Because you're turning off the flash, the camera's shutter needs to stay open longer to increase the exposure. During this time, the camera picks up on the subtlest hand shaking movements, so put the camera on a steady surface or tripod. Another tip here is to use the countdown/self-timer mode on your camera, because when the timer counts down, you're standing AWAY from the camera and not shaking it. Excellent.
More topics to discuss later, including how to white/color balance (which is what I did to Travis' non-flash photo above), how to do extreme closeup shots that you guys love my photos for, photo composition, discussing little pearls of wisdom that may have eluded you until now, why extreme numbers of megapixels are overrated when buying a camera strictly for web use, making the most out of Photobucket for forum sharing and Ebay selling, and loads more. Hope you enjoyed this little lesson because it took me a half hour to type up. [img]/images/graemlins/laugh.gif[/img] Your feedback is GREATLY appreciated, as I know some of you have been requesting guitar-related photo tips for a while, and I was writing a big Microsoft Word document about it, but then abandoned it.
So let's see some pictures you've been practicing with, preferably with no flash!





Comment